6 Grunge SVG, Grunge Texture, and Patterns: A Practical Guide for Designers and Creators
Grunge aesthetics offer a raw, tactile quality that clean vector art often lacks. Whether you are designing merchandise, building a brand identity, or crafting physical products, a well-curated collection of grunge SVG elements, textures, and patterns can accelerate your workflow and give your projects an authentic, worn-in look. This article focuses on a specific set of six grunge SVG and texture assets, along with accompanying file formats, and explains how to integrate them into real creative and professional processes.
Understanding the 6 Grunge SVG, Grunge Texture, and Patterns Collection
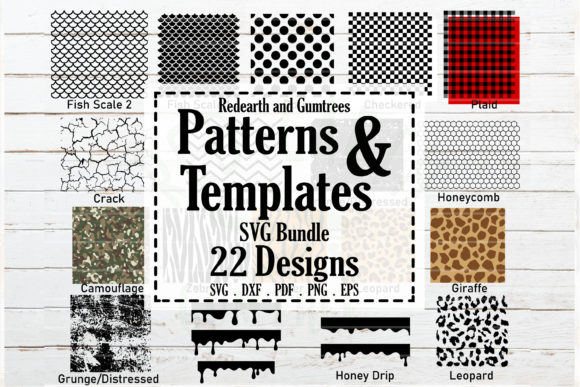
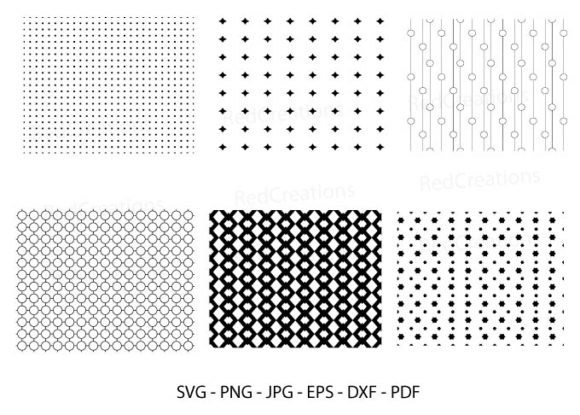
This collection is not just a random assortment of distressed shapes. It is a curated set of six distinct grunge elements — each with its own texture, density, and character. You receive each design in multiple formats: SVG, PNG, JPG, EPS, DXF, and PDF. This variety ensures that the same grunge look can be used across vector-based editing, raster compositing, print production, and cutting-machine workflows without requiring format conversions that degrade quality.
The grunge textures in this set range from subtle grain overlays to heavy, distressed edges. The patterns repeat seamlessly or stand alone as individual splatters, scratches, or worn surfaces. Because these are not generic stamp brushes, you can rely on consistent scaling and detail retention when you enlarge or reduce them.
Integrating Grunge Assets Into Your Creative Workflow
Grunge textures and SVG patterns should not be afterthoughts. They work best when you plan their placement early in your process. Consider the following stages:
- Preparation. Before you open your design software, organize the provided files into a dedicated asset folder. Rename the six core designs with descriptive labels (e.g., grunge_heavy_splatter.svg, texture_fine_grain.png) so you can find them quickly during a busy production run.
- During the design phase. Import the SVG or EPS files directly into Illustrator, Affinity Designer, or Inkscape. Because these are vector formats, you can recolor them, mask them, or combine them with text without losing edge sharpness. For raster-based projects, use the PNG or JPG versions with blending modes (Multiply works well) to layer grunge over flat colors or photographs.
- After completion. When you export final files, take note of the grunge layer’s opacity and whether it remains editable. Keeping the SVG source in a separate layer preserves flexibility for future edits or variations.
This collection fits into both digital-first workflows (social media graphics, web backgrounds) and physical production (sublimation, screen printing, vinyl cutting). The DXF and PDF files extend usability to CAD-like cutting machines and print-on-demand services that require flattened, precise outlines.
Practical Uses Across Different Media
The same set of six grunge assets can be repurposed for a wide range of products and projects. Here are concrete examples of how professionals and hobbyists have used similar collections effectively:
- Card making and photo albums. Apply a grunge texture PNG as an overlay on a solid background to give paper crafts an aged, scrapbook feel. The JPG versions work well as pre-rasterized textures for printing at 300 DPI.
- Framed artwork. Scale an SVG pattern to fit a canvas mockup. Because these are vector, you can maintain crisp detail even at poster size. Add the grunge element as a semi-transparent top layer to simulate worn paint or patina.
- Sublimation and apparel. Use the EPS or SVG files to create heat-transfer designs on t-shirts, mugs, cups, and other sublimation blanks. Grunge textures help printed areas look like distressed fabric rather than flat plastic. Ensure your software outputs the design as a mirrored, high-contrast PNG for pressing.
- Stickers and decals. Import the DXF file into your cutting machine software (Cricut Design Space, Silhouette Studio). The grunge outlines can become sticker shapes themselves, or they can act as overlays on custom text. Weeding is straightforward because the vector paths are clean despite the distressed appearance.
- Other DIY projects. From laptop skins to tote bags, these textures scale reliably. For wood-burning or etching, trace the SVG lines directly — just verify that the grunge pattern does not contain too many fine details for your tool’s bit size.
File Format Selection for Different Tools and Platforms
One of the strongest features of this 6-piece collection is the inclusion of six file types. Knowing which format to use in which situation saves time and prevents quality loss.
- SVG. Use for Cricut, Silhouette, and other vector-cutting systems. Also ideal for web design, because the file is small and scales without pixelation.
- PNG. Best for layered compositions in Photoshop or Canva. The transparent background lets you place the grunge texture over any color or image. Use 300 DPI for print and 72 DPI for screen.
- JPG. Suitable when you need a full-color background with grunge already blended. These files are larger but useful for quick mockups or social media posts where transparency is not required.
- EPS. The preferred format for professional print shops and sign makers. EPS preserves vector paths and color spaces. If your output device expects CMYK, open the EPS in Illustrator and convert from RGB.
- DXF. Designed for CAD-like cutting machines and laser engraving. Because DXF files store geometry rather than styling, they work well for physical fabrication where you need exact outlines.
- PDF. Useful for proofing and sharing with clients or collaborators. You can also send PDFs directly to print-on-demand services that accept vector formats.
A practical tip: Keep a master folder with subfolders by format. When you start a new project, copy only the formats you need rather than moving the entire collection. This prevents accidental overwrites and keeps your source archive clean.
Organizing Your Grunge Asset Library for Efficiency
Creators who handle multiple projects benefit from a consistent naming and tagging system. For this collection:
- Rename each of the six designs using a prefix that indicates style — for example, GR_Splatter_01, GR_Grain_02, GR_Scratch_03, and so on.
- Create a spreadsheet or note that maps each design to its best use case (e.g., “GR_Splatter_01 works well for large surfaces but weeding is slower”).
- Store the SVG and EPS files in a “Vector originals” folder. Keep the PNG and JPG in a “Raster ready” folder at 300 DPI. Store DXF and PDF in a “Cut files” folder.
- If you work with a team, set permissions so that the original set is read-only and each designer maintains their own working copies.
This structure may seem detailed, but it pays off when you have tight deadlines. Instead of hunting through downloads, you can pull the exact grunge texture you need in under ten seconds.
Quality Control and Consistency Across Projects
Grunge textures are meant to look irregular, but the underlying file integrity must be consistent. Run these checks before depending on the collection for client work:
- Scale test. Open one SVG and enlarge it to 500%. Check that no stray points or jagged edges appear. Vector grunge should remain smooth.
- Color space. If you work in CMYK print, convert the EPS or PDF files early. RGB grunge textures placed in a CMYK document can shift unpredictably.
- Transparency handling. For PNG and JPG, verify that the alpha channel (or white background) behaves as expected when you layer multiple textures. Some PNGs may have embedded gamma that causes outlines — adjust in your image editor.
- Cutting machine settings. Before running a full batch, cut a small test piece from the DXF. Adjust pressure and blade depth so the distressed edges cut cleanly without tearing the carrier sheet.
By building these checks into your routine, you avoid costly reprints and wasted materials. Consistency also helps your brand if you use the same grunge style across product lines — customers recognize the aesthetic as part of your identity.
Long-Term Reusability and Iteration
The real value of a grunge SVG and texture collection lies in how many times you can reuse it without the output feeling repetitive. Because this set includes both heavy and subtle textures, you can combine them in different ways. For example:
- Use the fine grain PNG as a global overlay on all mockups to tie a series together visually.
- Rotate between the six SVGs as accent elements on different apparel designs. Each shirt in a line can feature a different grunge splatter while keeping the same color palette.
- Create derivative patterns by layering two textures at different opacities, then exporting a new PNG for later use. This expands your library without additional purchases.
Because the files are delivered in multiple formats, you are not locked into one software ecosystem. A designer who switches from Adobe to Affinity or from Cricut to LaserGRBL can still access the same grunge assets. That portability makes this collection a long-term asset for evolving workflows.
In professional settings, consistency in asset management and usage directly affects turnaround time and client satisfaction. Following the strategies outlined here — preparation, format selection, organization, quality checks, and creative recombination — transforms a simple set of six grunge SVG textures and patterns into a reliable component of your daily production toolkit. Whether you are making a single framed artwork for a client or running a small production line of custom mugs, these files are ready to support the entire process from concept to finished product.